

How To Wrap Text In A Circle Photoshop
Today'southward tutorial is for those of yous who may exist looking to go your feet moisture with Adobe Photoshop. In this lesson I'll be demonstrating how yous can wrap text around a circumvolve with Photoshop — both inside and exterior of a circumvolve. This is something that fifty-fifty a first-time user of Photoshop tin follow forth with.
The post-obit is a summarized overview of the steps taken to become your text wrapped around a circumvolve. For a more in-depth learning experience with step-by-pace instructions, be sure to check out the video tutorial below:
Wrap Text Effectually A Circle with Photoshop
To wrap text around a circumvolve with Photoshop, nosotros'll need to progress through the following steps…
- Step i: Create a new document with horizontal and vertical guides, so create a circle in the middle of the canvas
- Step ii: Apply the Horizontal Type Tool to place your text around the outside edge of the circle
- Pace 3: Use the Path Selection tool to adjust the positioning of your text on the circle
- Step 4: Create a new circumvolve on a new layer that is larger than the original circle
- Step v: Using the Horizontal Type Tool again, place text on the inside of the new, larger circle
Allow'southward explore these steps in more than detail.
Step one: Create A Document
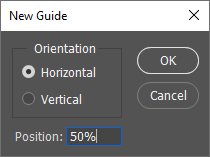
The first thing we're going to practice is create a new certificate sized at 1,280 x 1,280 pixels, so create both a vertical and horizontal guide, each at fifty%. You tin can exercise this by navigating to View > New Guide.
Your document should await something like this…

Now nosotros're going to take hold of the Ellipse Tool to create a circumvolve in the centre of the canvas. The tool is hidden inside a sub menu of the Rectangle Tool, and so be sure to right-click the tool to bring upwardly the sub carte.

Bring your cursor to the center of the page, where the horizontal and vertical guides intersect, then click and drag to create an ellipse. While property the click, press down on Shift and Alt on your keyboard. This will allow y'all to create a perfectly symmetrical circle that expands from the middle of the certificate.

Step 2: Place Your Text On The Circle
Grab the Horizontal Blazon Tool (keyboard shortcut: T) and click on the outer edge of your circle. This will generate a blinking cursor on the circle. Once you lot brainstorm to type, the text will be generated around the circle.

You can adapt the font, style, size, and color of your text in the toolbar at the top of the screen. For this tutorial I'm using League Gothic, just you lot can use whatsoever font you'd like.

Footstep 3: Adjust The Positioning
Now it's time to rotate the circumvolve so that we tin position the text exactly where we'd similar it to be on the circle.
To do this, catch the Path Selection Tool (keyboard shortcut: A) and click and drag the little black node on the edge of the circumvolve to adjust the placement of the text.

Stride 4: Create A New Circle
Now that the top one-half of the text is wrapped around the outside of the circle, we're going to piece of work on creating some more than text and wrapping it around the inside of a circumvolve.
Commencement, press command + shift + N on your keyboard to create a new layer, and so grab the Ellipse Tool over again and create some other circle starting from the eye of the folio. Over again, make sure to concord shift and alt while scaling the circumvolve and then that it locks the proportions and expands from the middle of the canvass, just like y'all did for the kickoff circumvolve.
Make this circle larger than the previous circle. It should be just large enough that the edge of the circle lays flush against the top of the text you've already created.

Your newly-created circle will probably cause the text you previously created to no longer exist visible. To correct this, simply click and drag the new layer (in the Layers card to the lesser-right of the screen) below the superlative layer so that it becomes the 2nd layer. Your text should go visible once more.
Footstep 5: Generate Text On The Within Of Your Circumvolve
Catch the Horizontal Type Tool once once again and click on the outer edge of the new, larger circle in order to add some text to it.
The text will be placed on the outside of the circle at first.

The wrap your text around the inside of the circle, grab the Path Pick Tool again, so click and elevate the node on the edge of the circle and bring it within of the circumvolve. This will lead the text within the circle as well. While you're at it, you tin utilise the aforementioned tool to adjust the placement of the text inside of the circumvolve.

You may find that after you lot placed your text, the letters look a little cramped and too close together. To space them out a little further, grab the Type tool once again and triple-click on the text to highlight the entire line. Then, concur Alt on your keyboard and press the right arrow cardinal on your keyboard until the letter spacing is consistent with the text on the top/outside of the circle.

The last step is to but plough off the visibility of the two circle layers and the background layer, and we're done!

At this point you can choose to salvage your work or export it as a PNG or JPG if you'd like. And that is how you lot tin can wrap text around a circle with Photoshop!
Determination
It's not very difficult to wrap text around a circle with Photoshop. In fact, if you lot've watched my tutorial virtually doing the same with Illustrator then you'll probably realize that it'southward quite similar. One thing I love about working with Adobe software is how consistent the workflow is when working across all of the dissimilar applications.
If yous have any questions merely leave a comment below. As ever, thanks for watching!

Become A Principal of Adobe Illustrator!
Want to learn more than most how Adobe Illustrator works? Check out my Illustrator Explainer Serial - a comprehensive collection of over 100 videos where I go over every tool, feature and function and explain what it is, how it works, and why information technology's useful.
Logos Past Nick LLC is a participant in the Amazon Services LLC Associates Plan, an affiliate advertising plan designed to provide a ways for sites to earn advertising fees by advertizement and linking to Amazon.com. Every bit an Amazon Acquaintance I earn from qualifying purchases. Read chapter disclosure hither.
Source: https://logosbynick.com/wrap-text-around-a-circle-with-photoshop/
Posted by: johnsoneffat1978.blogspot.com
0 Response to "How To Wrap Text In A Circle Photoshop"
Post a Comment